
Table of Contents
- Start With a Room-by-Room Home Staging Checklist for Sellers
- Tip 1: Declutter and Depersonalize Before You Do Anything Else
- Tip 2: Decide Which Rooms to Stage When Selling a House
- Tip 3: Boost Curb Appeal for Charleston’s Climate and Architecture
- Tip 4: Stage a Home While Living in It Without Losing Your Mind
- Tip 5: Deep Clean and Create a Spacious Feel With Less Furniture
- Tip 6: Use Neutral Paint and Broadly Appealing Decor to Attract Buyers
- Tip 7: Home Staging Tips for Listing Photos That Stop the Scroll
- Frequently Asked Questions
Last Updated: October 9, 2026
Start With a Room-by-Room Home Staging Checklist for Sellers
Home staging is the process of preparing a house so it looks its best to potential buyers. It’s about removing distractions, opening up space, and helping people picture themselves living there. At The Mills Team, we’ve watched staging turn “nice house” into “we need to make an offer today” more times than we can count.
The stakes are real. Zillow research shows homes with staged listing photos get significantly more views than similar homes without them. More eyes means more showings. More showings means a faster sale.
Below, we’ll walk through seven proven home staging tips, plus a room-by-room checklist you can start using this weekend.
The Pre-Listing Walkthrough: What to Check in Every Room
Walk through your home like a buyer seeing it for the first time. Stop at each doorway and ask one question: What stands out first?
A common mistake is checking rooms you already cleaned. Start with the messy ones. Here’s what to scan in each space:
- Entryway: shoes, mail piles, coats, scuffed baseboards
- Living room: clutter on tables, too much furniture, tangled cords
- Kitchen: items on counters, dishes in the sink, fridge magnets
- Bedrooms: personal photos, laundry, crowded nightstands
- Bathrooms: toiletries on display, damp towels, water spots
- Outdoor spaces: toys, tools, dead plants, dirty siding
Write down every issue you see. That list becomes your staging plan.
Tip 1: Declutter and Depersonalize Before You Do Anything Else
Decluttering and depersonalizing come first because everything else builds on them. Skip this step and no amount of neutral paint will fix the problem.
The goal is simple: remove distractions so buyers focus on the house, not your stuff.
Start with personal photos, diplomas, and collections. Buyers should see a home, not someone else’s life. Pack up family pictures, religious items, and anything with your name on it.
Next, clear out unnecessary items. That means:
- Countertop appliances you rarely use
- Extra furniture that crowds rooms
- Books, knickknacks, and papers
- Clothing you won’t wear before moving
- Pet evidence, including beds, bowls, and toys
Rent a storage unit if you need one. Packed closets and garages read as “not enough space” to buyers.
Store about a third of your belongings before listing. Homes that feel slightly sparse show better than homes that feel full, and you’ll have less to pack on moving day.
Tip 2: Decide Which Rooms to Stage When Selling a House
Not every room deserves the same effort. When selling a house, stage the rooms buyers care about most: the living room, primary bedroom, kitchen, and entryway.
Here’s how we’d prioritize:
| Priority | Room | Why It Matters |
|---|---|---|
| 1 | Living room | Sets the tone for the whole tour |
| 2 | Kitchen | Buyers make emotional decisions here |
| 3 | Primary bedroom | Should feel calm and roomy |
| 4 | Entryway | First impression, inside and out |
| 5 | Bathrooms | Should read clean and bright |
Spare bedrooms and hallways need less work. A quick declutter and a fresh coat of neutral paint are usually enough.
Tip 3: Boost Curb Appeal for Charleston’s Climate and Architecture
Curb appeal matters here more than in most markets. The combination of high humidity, salt-laden air, and intense afternoon sun accelerates wear on paint, wood, and metal, and buyers touring in spring and summer see that wear up close. A front elevation that looks tired signals deferred maintenance before the buyer ever reaches the door.
Start at the front entrance. A clean door with fresh exterior paint makes a strong first impression. Replace a rusty mailbox and fix loose trim while you’re at it. On historic homes, match the door color and hardware style to the period rather than chasing a trend, buyers who tour older properties tend to notice mismatched details.
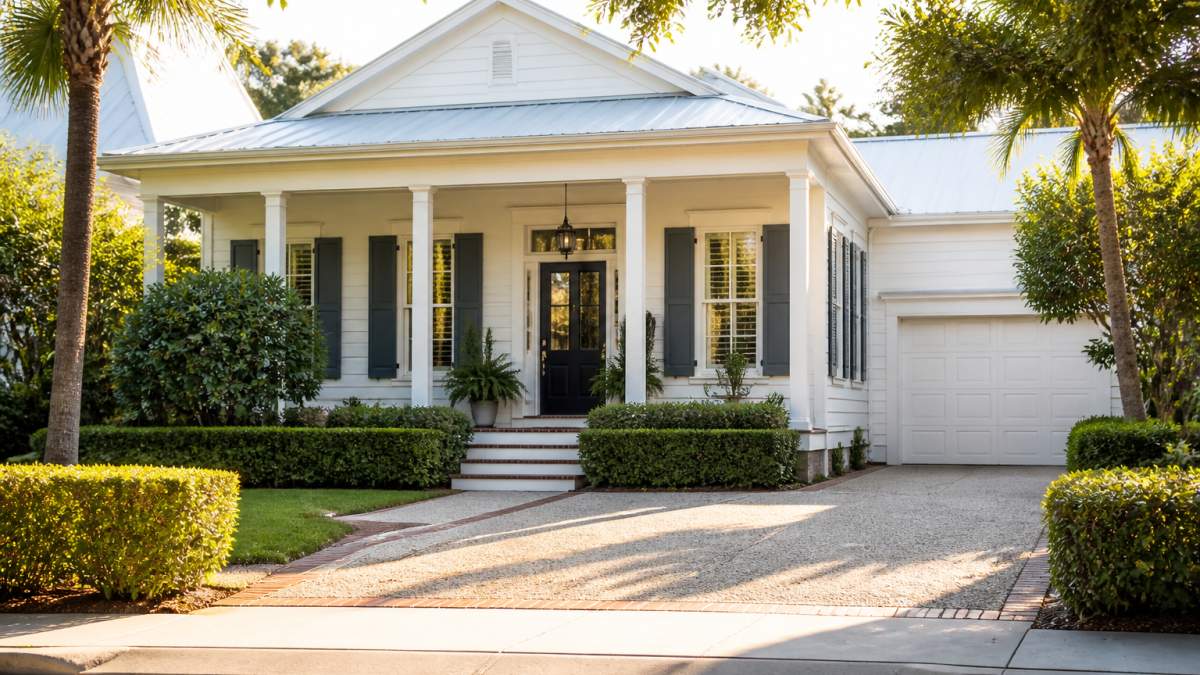
Then work outward, in the order buyers actually see things from the street:
- Roof and gutters first. Clear debris and check for missing or lifted shingles. In a humid climate, organic matter sitting in gutters holds moisture against the fascia and speeds rot.
- Siding and driveways next. Pressure wash to remove mildew and the green film that builds on north-facing surfaces. Use the lowest pressure that gets the job done, too much pressure etches wood and drives water behind siding.
- Beds and hedges third. Trim hedges below the window line so the house reads larger from the curb. Pull weeds and refresh mulch, but keep it below the siding line so it doesn’t wick moisture into the wall.
- Potted plants last. A few pots near the door add color without permanent commitment. Choose plants that tolerate heat and humidity so they still look good on showing day.
Local architecture matters too. A historic home near downtown calls for different landscaping than a newer build in the suburbs. Match your curb appeal to the neighborhood: period-appropriate trim and shutters on older homes, clean modern lines on newer ones.
Schedule exterior work at least two weeks before listing photos. Fresh paint, washed siding, and trimmed beds need time to dry, settle, and look natural under a camera.
If your budget is tight, prioritize in this order: clean first (free), then repair (low cost), then replace (higher cost). Cleaning and small repairs usually move the needle more than a full landscaping overhaul.
Tip 4: Stage a Home While Living in It Without Losing Your Mind
Staging a home while living in it is possible, but it takes a routine. The trick is keeping the house “show-ready” without cleaning all day.
Try these habits:
- Make beds and wipe counters before you leave each morning
- Keep a basket for quick clutter sweeps before showings
- Use one closet as your “staging closet” for daily items
- Switch to paper plates on showing days to skip dish piles
- Set a 20-minute tidy timer every evening
Buyers book showings with little notice. A simple routine keeps you from scrambling.
Don’t leave valuables, medication, or mail out during showings. It’s a safety issue, and it makes buyers uncomfortable in your space.
Tip 5: Deep Clean and Create a Spacious Feel With Less Furniture
A deep cleaning does more for buyer appeal than any decor purchase. Clean homes feel cared for, and buyers pay attention to that.
Focus on the spots people touch and notice:
- Baseboards, vents, and light switches
- Inside windows and window tracks
- Grout, tile, and glass shower doors
- Ceiling fans and light fixtures
Then tackle the furniture. Remove unnecessary furniture to create a spacious atmosphere. Walkways should be clear. Sofas shouldn’t block windows.
Rent a storage unit for extra pieces. A room with less furniture looks bigger, and buyers can imagine their own things in it.
Tip 6: Use Neutral Paint and Broadly Appealing Decor to Attract Buyers
Neutral colors help buyers see themselves in your home. Bold walls make them think about repainting, and that’s a cost they’ll factor into their offer.
Go with warm whites, soft grays, and light beiges. Paint the walls, trim, and ceilings if they look tired. Fresh neutral paint also helps with listing photos, which we’ll cover next.
Decor should stay simple. A few pillows, a plant, and one piece of art per room is plenty. Remove distractions like themed collections or heavy window treatments.
Neutral paint and simple decor aren’t about being boring. They’re about removing reasons for a buyer to say no.
Tip 7: Home Staging Tips for Listing Photos That Stop the Scroll
Most buyers see your home online before they ever see it in person. That’s why home staging tips for listing photos matter as much as the staging itself. A photo set is not a tour, it’s a series of still frames, and every frame has to earn the click.
Work in this order so you’re not redoing rooms:
One week before the shoot
- Finish all paint touch-ups and repairs. Wet paint and fresh spackle read as smudges on camera.
- Replace burned-out bulbs with matching color temperature. Mixed warm and cool bulbs create uneven color casts that are hard to fix later.
- Wash windows inside and out. Clean glass is the single biggest driver of bright, inviting photos.
The day before the shoot
- Clear every countertop completely, kitchen, bathroom, laundry, and any built-ins.
- Remove trash cans, cords, chargers, remote controls, and pet items from every room in the frame.
- Fluff pillows, straighten rugs, and align furniture edges with walls so lines look intentional.
- Hide personal photos, mail, and medication. These are the details buyers zoom in on.
The morning of the shoot
- Open every blind and curtain. Turn on every light, including lamps and under-cabinet fixtures.
- Check sightlines from each doorway. If your eye lands on a cord, a bin, or a cluttered shelf, move it.
- Look for reflections in mirrors, glass doors, and TV screens. Photographers and tripods show up in shiny surfaces, and so do clutter piles behind the camera.
- Do a final pass with a basket: walk room to room and pull anything that doesn’t belong in the frame.
A video tour helps too. Buyers who watch a walkthrough arrive already interested, which makes your in-person showing easier. Walk the path a buyer would walk, front door, main living space, kitchen, primary bedroom, primary bath, and make sure each transition is clear of obstacles.
The National Association of REALTORS guide to home staging notes that staging helps buyers visualize the home as their own. That’s the whole point. The photos are the first version of that visualization, so treat the camera as your first showing.
If a room doesn’t photograph well, it won’t get shown. Fix the frame before you fix the furniture.
Ready to sell? HUD’s guide to selling your home offers a solid overview of the selling process from start to finish.
Frequently Asked Questions
How much quicker do staged homes sell?
Staged homes consistently sell faster than unstaged ones. The exact speed difference depends on your price point, neighborhood, and market conditions, but staging gives buyers fewer reasons to hesitate. In the Charleston Tri-County area, homes that show well from the first photo tend to attract more showings in the first two weeks, which is when buyer interest peaks. A focused home staging plan helps you capture that early momentum instead of sitting on the market for months.
Which rooms should you stage first when selling a home?
Start with the rooms buyers see first and use most: the living room, primary bedroom, and kitchen. These three spaces carry the most weight in listing photos and in-person showings. After those, move to the entryway and dining area. Bathrooms matter too, but a thorough clean and a few neutral touches usually do the job. If your budget or time is limited, putting your effort into the living room, primary bedroom, and kitchen gives you the best return.
Can you stage a home while still living in it?
Yes, and most sellers do. The key is treating staging as an ongoing routine rather than a one-time project. Keep counters clear, store personal items in bins, and build a five-minute reset into your daily schedule before showings. A home staging checklist for sellers helps you stay consistent. You do not need to move out. You need a system that keeps the home showing-ready without disrupting your daily life.
What should you remove before listing photos?
Remove personal photos, refrigerator magnets, bathroom toiletries, pet bowls and beds, visible trash cans, and anything with your name on it. Clear kitchen counters down to one or two decorative items. Take down family collections and religious items if they are prominent. The goal is to let buyers picture themselves in the space. A clean, neutral backdrop also makes your listing photos look brighter and more spacious, which helps your home stand out online.
Selling a home in the Charleston area takes more than good photos and a sign in the yard. It takes a plan, and it takes someone who knows what local buyers want. The Mills Team brings 69+ years of combined experience, a 45-day home selling system, and a 3% listing fee structure to every listing. Our multi-tier marketing puts your home in front of the right buyers fast. Get started with The Mills Team and sell your home with confidence.